Why is this functionality useful?
Managing date ranges widget by widget can be time-consuming, especially in reports containing multiple visualizations and data components.
With Widget Date Overwrite, users can:
- Update all supported widgets in a report at once
- Quickly align reports to a specific monitoring period
- Standardize the displayed timeframe across widgets
- Reduce manual configuration effort
- Generate reports for past monitoring periods by applying a custom date range, regardless of the actual date when the report is created or exported
Feature Highlights
- Bulk overwrite of widget date ranges
- Supports predefined time shortcuts and custom date selections
- Applies changes to all compatible widgets in the report
- Displays a confirmation warning before applying permanent changes
How does it work?
1. Opening the Widget Date Overwrite Tool
- Open a report teplate.
- Click the Date Override button
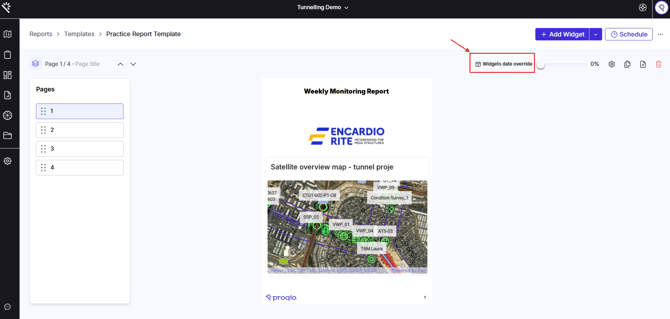
- A modal window will appear.
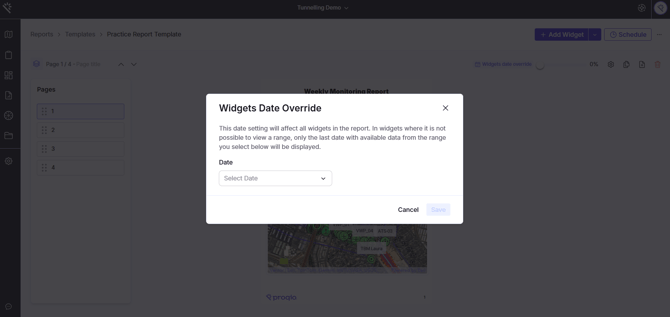
2. Selecting the Date Range
Inside the modal, users can:
- Select a predefined time shortcut
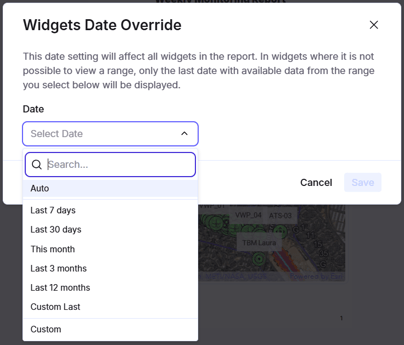
- Configure a custom date or time range
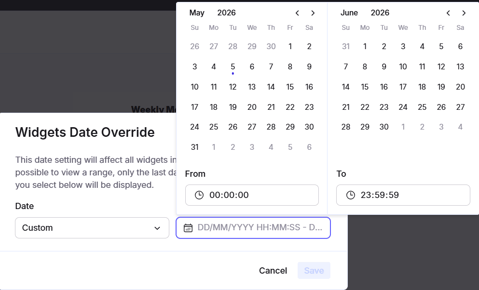
The selected configuration will be prepared to apply across all supported widgets in the report.
Unsupported Widgets
The Widget Date Overwrite action cannot be applied to the following widget types:
- Last Reading widget
- Map widget
- Text widget
- Image widget
- AutoDay widget
These widgets maintain their original behaviour and are not modified during the overwrite process.
Important Notes
- The overwrite action permanently replaces the existing widget date configuration.
- There is currently no history or undo option available after applying the overwrite.